

Resizing Single Product Image
WooCommerce 3.3 introduced a new and somesay easier way to resize product images. You can now change WooCommerce Product Image Size from Appearance > Customize > WooCommerce > Product Images. You don’t have to regenerate the images after resizing them. From WooCommerce 3.3 you can now crop, resize and automatically regenerate images all from the Appearance > Customize > WooCommerce > Product Images.
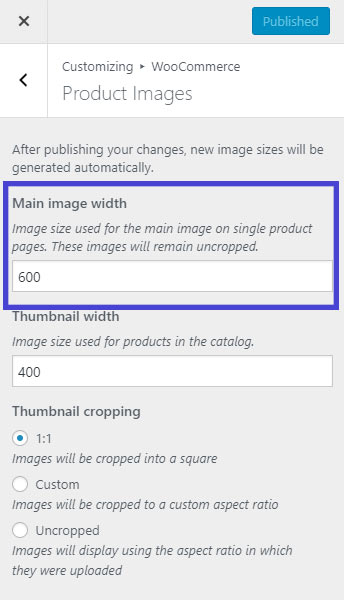
- Go to Appearance > Customize
- Then go to WooCommerce > Product Images
- Write your desired width in “Main image width” field.
- Click on “Publish”
Resizing Product Thumbnail Image
A great feature intdocuted in WooCommerce 3.3 is that thumbnail resizing is now automatic. Meaning after setting the width all of your product images will be automatically resized and regenerated in the background. Previously we had to install “Regenerate Thumbnails” plugin to regenerate the images to new resolution.
The following steps change shop, catalog or product category image size:
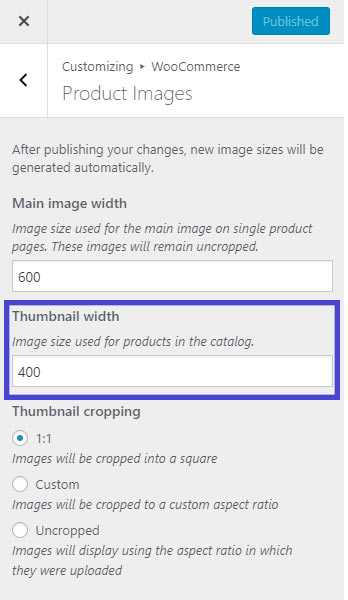
- Go to Appearance > Customize
- Then go to WooCommerce > Product Images
- Write your desired width in “Thumbnail width” field.
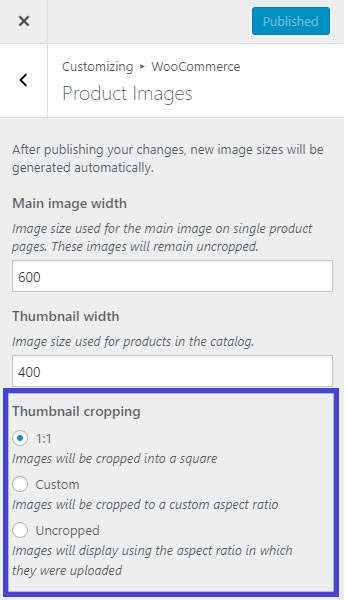
- You can set the height of the images in “Thumbnail Cropping”
- Click on “Publish”
Height of Shop Product Images
Thumbnail Cropping
- 1:1: By selecting 1:1, your images will be cropped into 360px width and 360px Height (assuming you have set the image width 360px in Thumbnail Width field.
- Custom: Custom means you can select the aspect ratio of the image. Here is some of the popular aspect ratio (1:1, 5:4, 4:3, 3:2, 16:9 and 3:1).
- Uncropped: The height of the image will be untouched. Images will display using the aspect ratio in which they were uploaded. (I do not recommend using this setting unless you are cropping the images externally before upload).


